
With my new love of Macrame and having learnt the classic square knot, I was looking to learn some new knots and expand my designs when it came to Macrame wall hangings. There are so many pretty macrame pieces on Instagram and Pinterest I love seeing how creative and inspiring people are.
SCROLL DOWN FOR THE VIDEO!

I want to create a new Macrame wall hanging for my best friends wedding, I always try and give handmade gifts for special occasions as mementos. I had the idea to create a heart design on my wall hanging but really struggled to find any tutorials to do this, so I decided to try and make my own. It took a few attempts to get the pattern right, but now I have, I’m happy to share it with you all.

What you will Need
Cotton Rope – I used 4mm
Wooden doweling
Scissors
How to Make
You can see my first tutorial on how to begin your Macrame here, this will help you get started with the basics. You will need 14 strands of rope attached to your dowel for this heart design. The Works do a pack of 3 dowels for a £1 and they work really great for smaller Macrame projects.
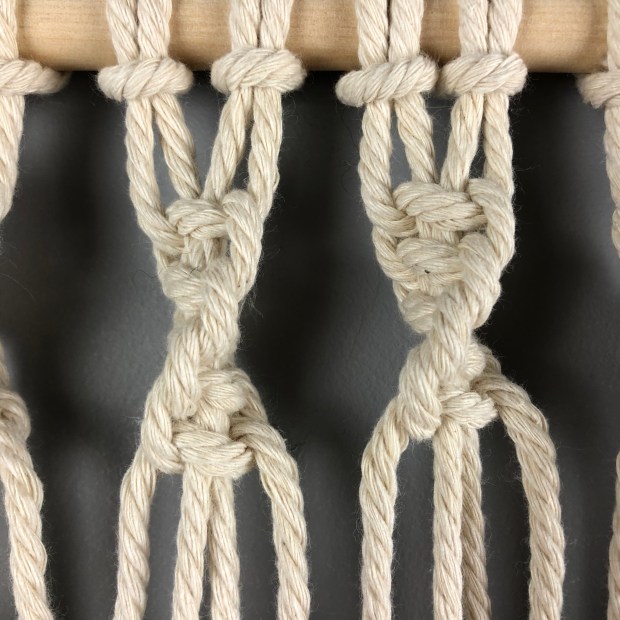
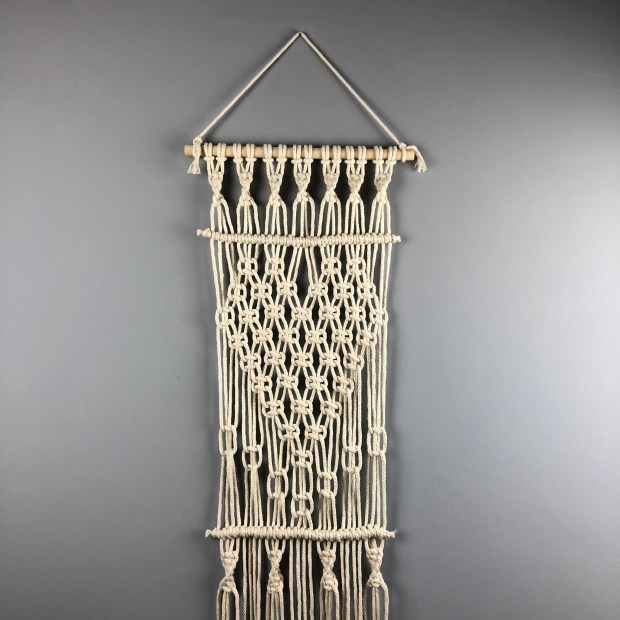
To start with I created these twisted columns by repeating the first half of the square knot 5 times, the rope will start to twist as you create the design. Apparently this knot is called a half square knot sinnet.
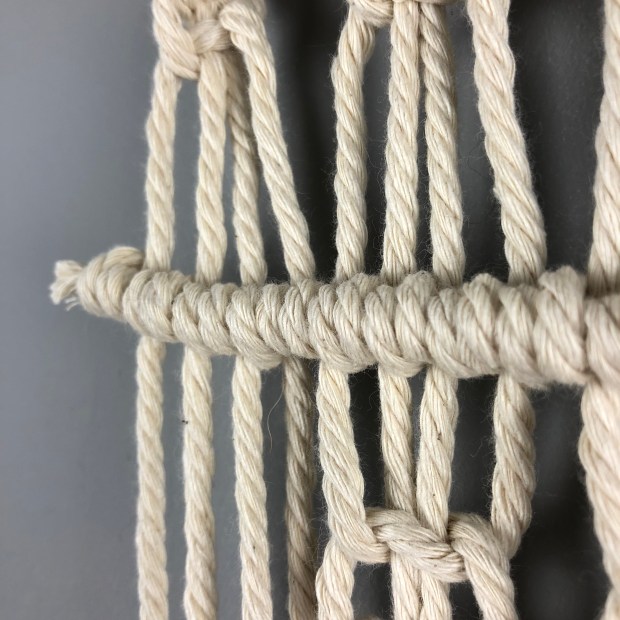
I then added in this cool half hitch knot to add a border and to define a clear new section to the design, it’s quite difficult to describe how to do this knot, but I followed this website here. I used a separate piece of rope placed vertically across the design as I didn’t want to use up one of my cords.

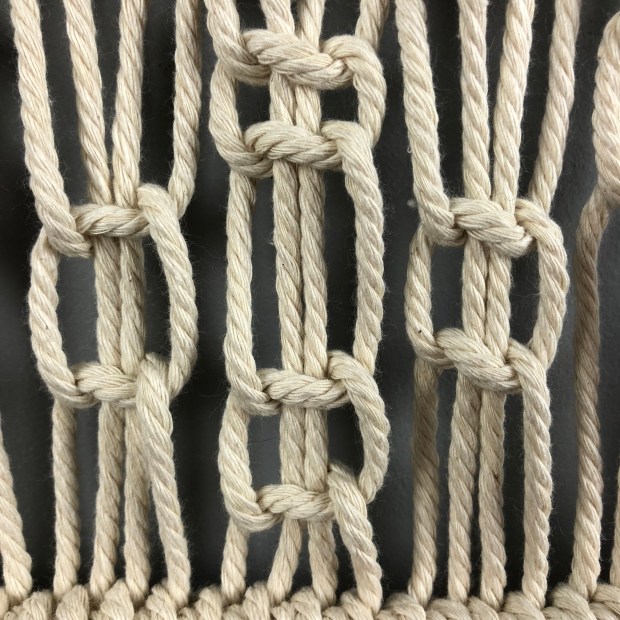
Next it is time to build the heart shape, I just used the square knot to make the design, use the photo above to help guide you what ropes to square knot and which ones to leave out on each row to create the macrame heart shape.
When the heart shape is complete, leave some long lengths of rope between the heart and add in a shallow V of wide square knots. Add a little more space under these square knots then create another border using the half hitch knot again.
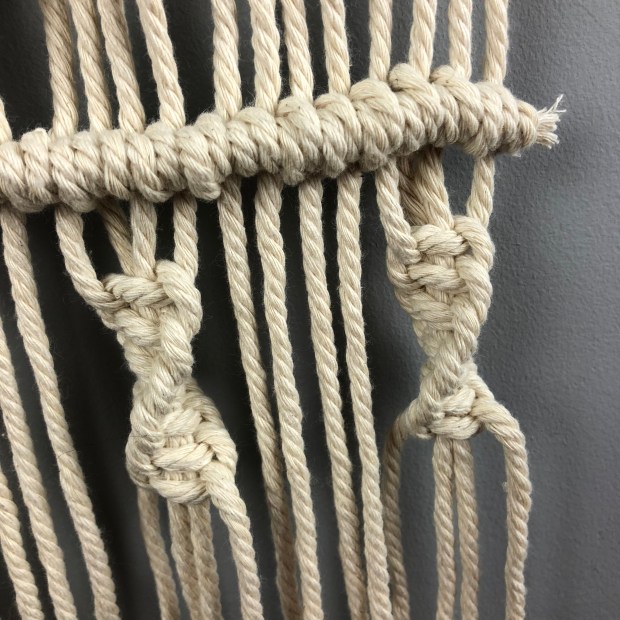
To finish the macrame I added some more half square knot sinnets under the border, missing out a row so there was just four twists. I then trimmed all the ropes to the same length.
I hope you enjoyed this tutorial on how to make a macrame heart wall hanging, my gift was well received and I can’t wait to see it hanging in the newlyweds home. If you have a go at some fibre art to create your own Macramé hanging let me know as I would love to see, tag @i_heart_maggie for Instagram or @IHeart_Maggie on twitter.
Love
Claire X
UPDATE: I finally made a video on a slightly different version of the macrame wall hanging, click the image below.


Could you please let us know how long the rope needs to be cut for this project. Thank you
LikeLike
Hi Elaine, I started with lengths of rope roughly 300cm or 120inches this gets doubled over so about half when hung. Thanks Claire x
LikeLike
Thank you so much! Feel free to share more….
LikeLike