
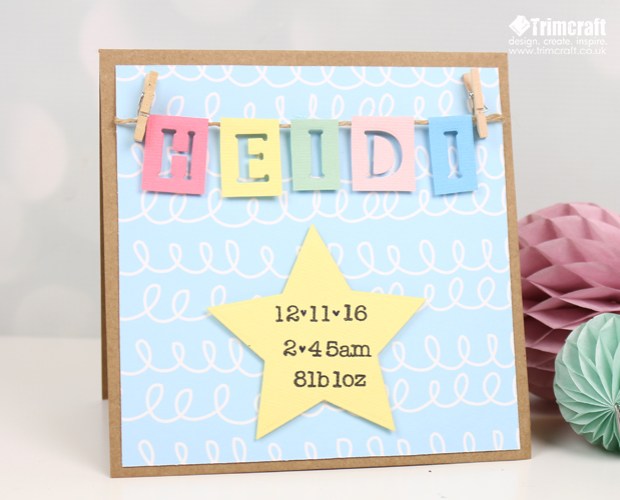
This card is so sweet, perfect for a girl or a boy and would look great framed as a keepsake for years to come.
What you will Need
Dovecraft 6×6 Card Blank
12×12 Simply Creative Make a Wish Paper
First Edition Textured Card Pad
First Edition Alphabet & Nesting Star Dies
Dovecraft Alphabet & Number Stamps
Twine , Black Ink & Adhesive 3D foam squares
How to Make
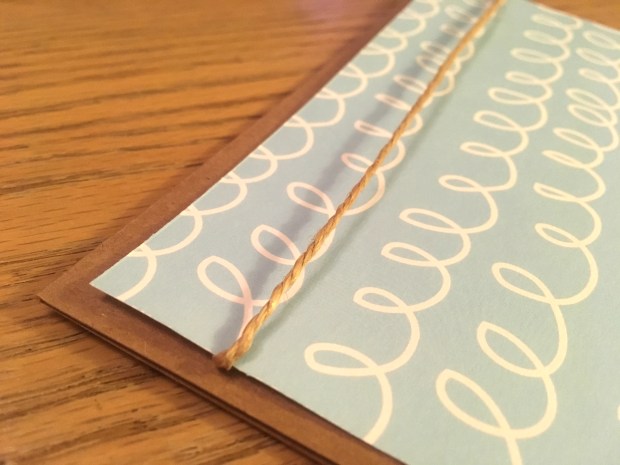
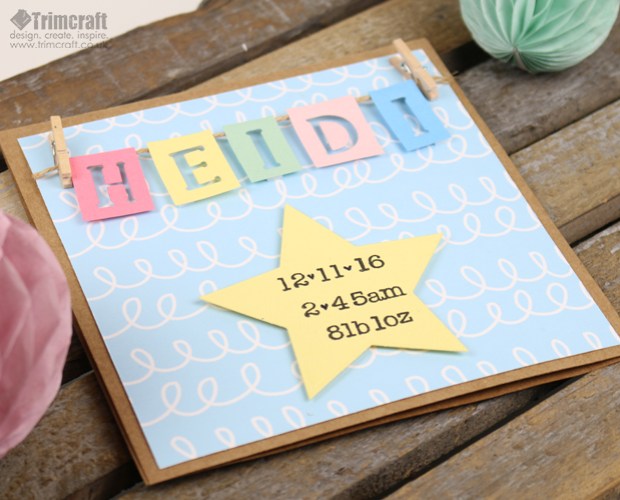
Cut a piece of the blue and white squiggle paper to 14.5×14.5 cms and wrap a piece of twine around the card, 2cms from the top of the paper, secure to the back.
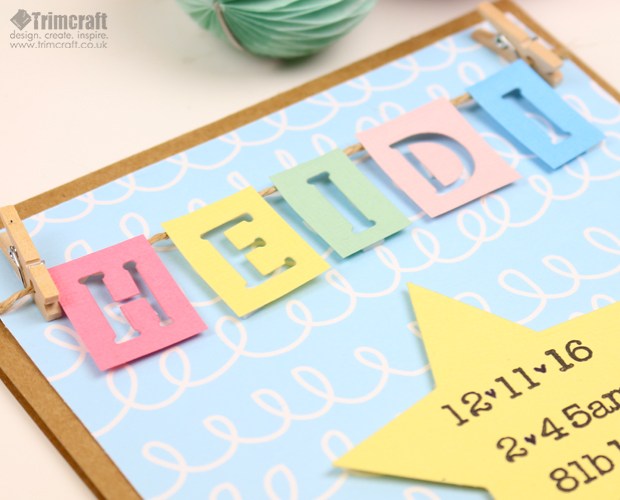
Choose a different coloured card for each letter of your name and die cut the letter out of the card leaving a small border around each letter.
TIP: save the letter diets to decorate your envelope to match.
Glue your letter blocks to the twine, you can add foam squares to the bottom to keep them in place. If you have a letter with a cut out middle you can also use foam squares to add these back into your die cuts, like I have on the letter D.
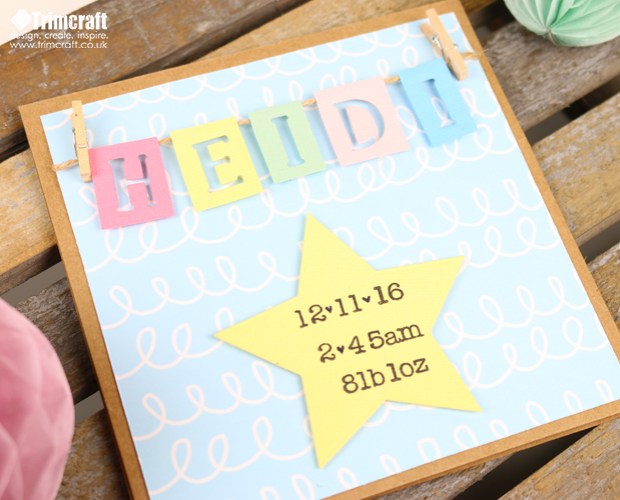
Die cut the third largest star onto yellow card and justing the stamps add the important details like date of birth, time of birth and baby weight. Stick to the card using foam squares.

As I mentioned before you can decorate your envelope to match with the die cuts and some of your favourite Washi tapes.
Once you have finished with the card you can frame it and use it to decorate the nursery, to enjoy for years to come.
I would love to see your versions of my personalised baby cards on social media, you can tag @i_heart_maggie on Instagram or @IHeart_Maggie on twitter.
Love Claire x
