
I am really enjoying using my Foil Quill to easily add a metallic touch to my craft projects, if you missed my review of the latest tool from We R Memory Keepers you can find some hints and tips here.
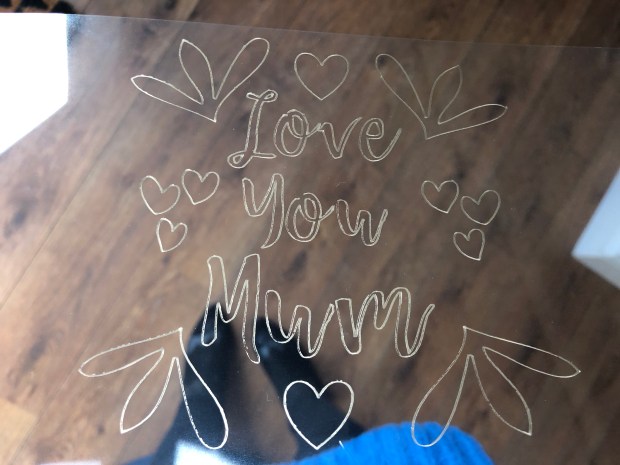
I have tried using my Foil Quill tool on a number of different surfaces including heat resistant acetate, now how cool is that!
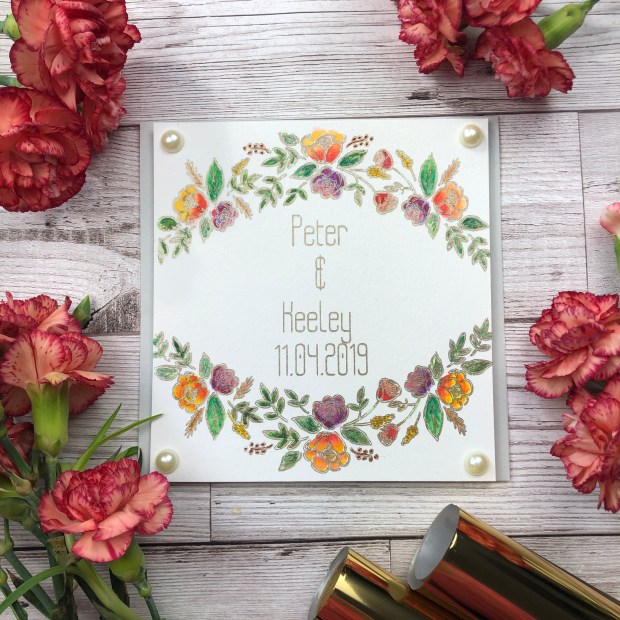
When I wanted to make a personalised wedding card for our friends upcoming nuptials, I combined foiling with watercolour to create this pretty card. This could easily be adapted to a whole number of occasions.
What you will Need
Watercolour Paper
We R Memory Keepers Foil Quill & foil
Electronic Paper Cutter – I used the Cricut maker
Watercolour paints and brush
6″x6″ Card Blank, paper trimmer, foam squares
How to Make
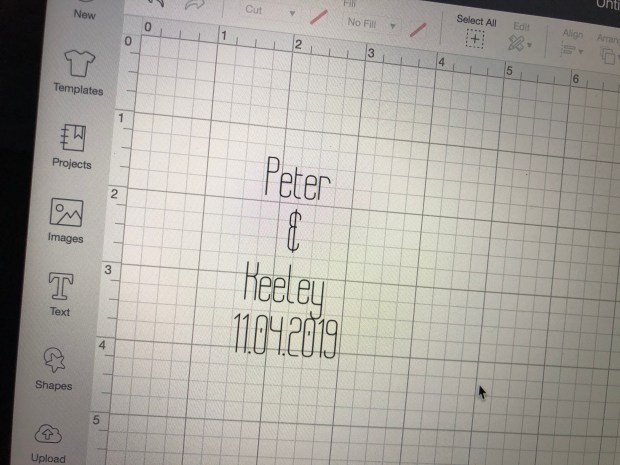
Open your Cricut design space and start a new project. Type your text, make sure you choose something that will foil well, the Foil Quill will only draw lines or outline shapes. I made the font bold so it stood out more on the finished card.
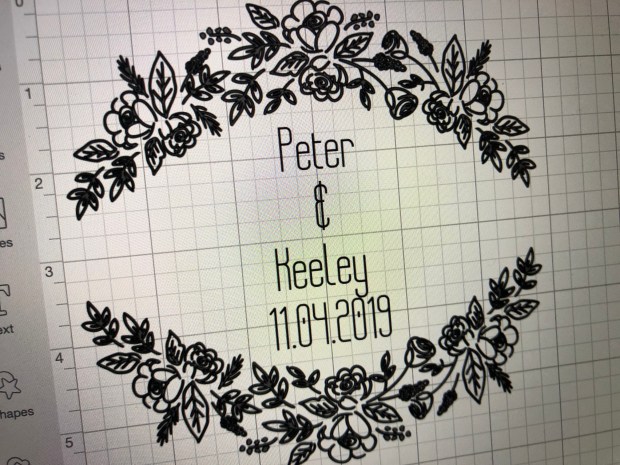
I found this really cool foliage and floral image in the design space, its great as it combines flowers and leaves perfect for painting. I flipped the top image to create the bottom piece and scaled to fit my 6″x6″ card blank. When happy with your design, weld the two images together. Don’t forget to check the image is set to draw and not cut.

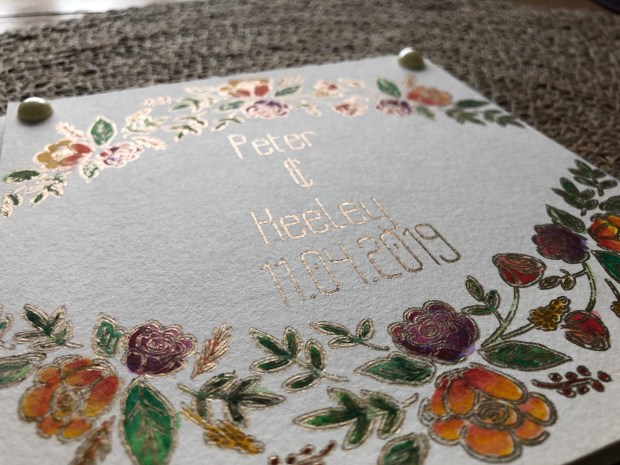
You can see when the design is changed to draw you get the outline shape but I think this looks really nice and gives a handmade feel to your crafts.
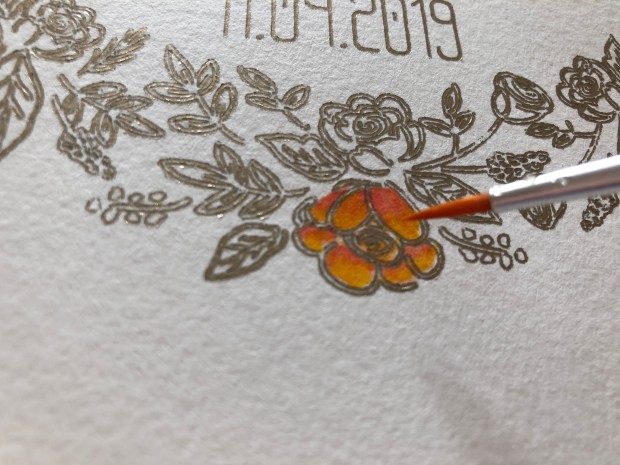
I started to paint the flowers with my watercolour paints. I added a little ombre look to my flowers for interest. The foil holds the paint inside the lines really well.
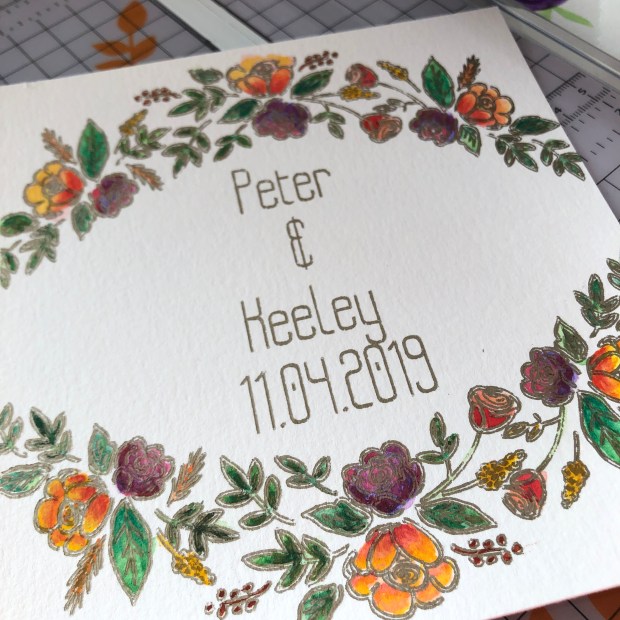
Have fun playing with colours and building up your design until you have painted the wreath. Once your image is dry, trim the design down just slightly smaller than 6″x6″.
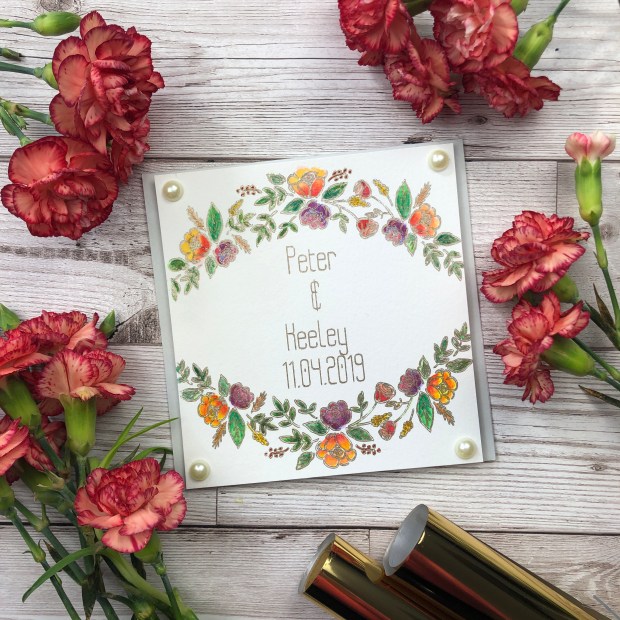
Add foam squares to the back of your watercolour paper, then stick to the centre of your card. I kept the card fold at the top, that is just my preference.

I finished my card with a 10mm ivory pearl in each corner of the card for a little extra detail.
This card could easily be customised for birthdays, new baby, new home or celebration cards. The great thing about the Foil Quill is it is linked to the design space so you can personalise the design in a thousand different ways.
If you combine watercolour paints and your Foil Quill then let me know, I would love to see so tag me on @i_heart_maggie for Instagram or @IHeart_Maggie on twitter.
Love
Claire X

Thanks!! So nice 🙂
LikeLike
Thanks for your comment 🙂 x
LikeLike